My daughter told me this was her best birthday party ever! We combined her birthday party with another friends party and had one big bash! The girls had so much fun.... both of us mom's were run ragged, but apparently we looked like we were holding it together pretty good!
Queen Elsa joined our party, she sang songs, played games and had the little ladies mesmerized!
I went a little more simplistic with my invites this time - but everyone still seemed to love them! I printed these images out and glued them to blue cardstock :D
First things first - we had to get things ready for the party!! I love pinterest of course so I was on there all the time looking for different ideas! I found a lady on etsy that makes these super cute tulle wands! I found it too late and had no time to order them - so I made them myself!! I took a Styrofoam ball, snowflake charms, a wooden dowel, tulling and a glue gun and started to put it together!
I glued the ball to the end of the dowel and painted it blue. Then I tied the snowflake charms to the ends of my ribbons and glued those onto the bottoms of the Styrofoam balls. I bought tulle from Micheals - it comes in rolls and I just cut it into little strips, twisted them in half and used the glue gun to start filling in the ball!! It was actually a lot easier to do then I thought it would be and the girls were so happy with them! The crowns I found at the dollar store :)
.jpg)
Then there was coming up with ideas for the kids to do during the party! A big hit at all of my parties is decorating your own cupcake! The kids love doing this! I made the cupcake boxes from Bristol board using a cube template I found on google. Made individual inserts to hold the cupcakes and added a pretty snowflake with everyone's names on it! Then at the party I gave the kids bowls of icing, sprinkles (I found a multi pack of assorted sprinkles at the dollar store) some markers and stickers to decorate and they were off! Usually I do this at my house and the clean up is really not that bad - this party was at a hall (with 40 kids, cough, cough) so the mess was not fun, but usually it works well with the kiddies!
.jpg)
What would a frozen party be without a snowball fight!?!! I still had a ton of white yarn leftover from the monster high wig I made my daughter, so it got me to thinking about these snowball puffs my mom used to make!! They are SO EASY to make! Apparently you can buy a tool to make them at Micheals, but I did it the cheapy way ;) lol!
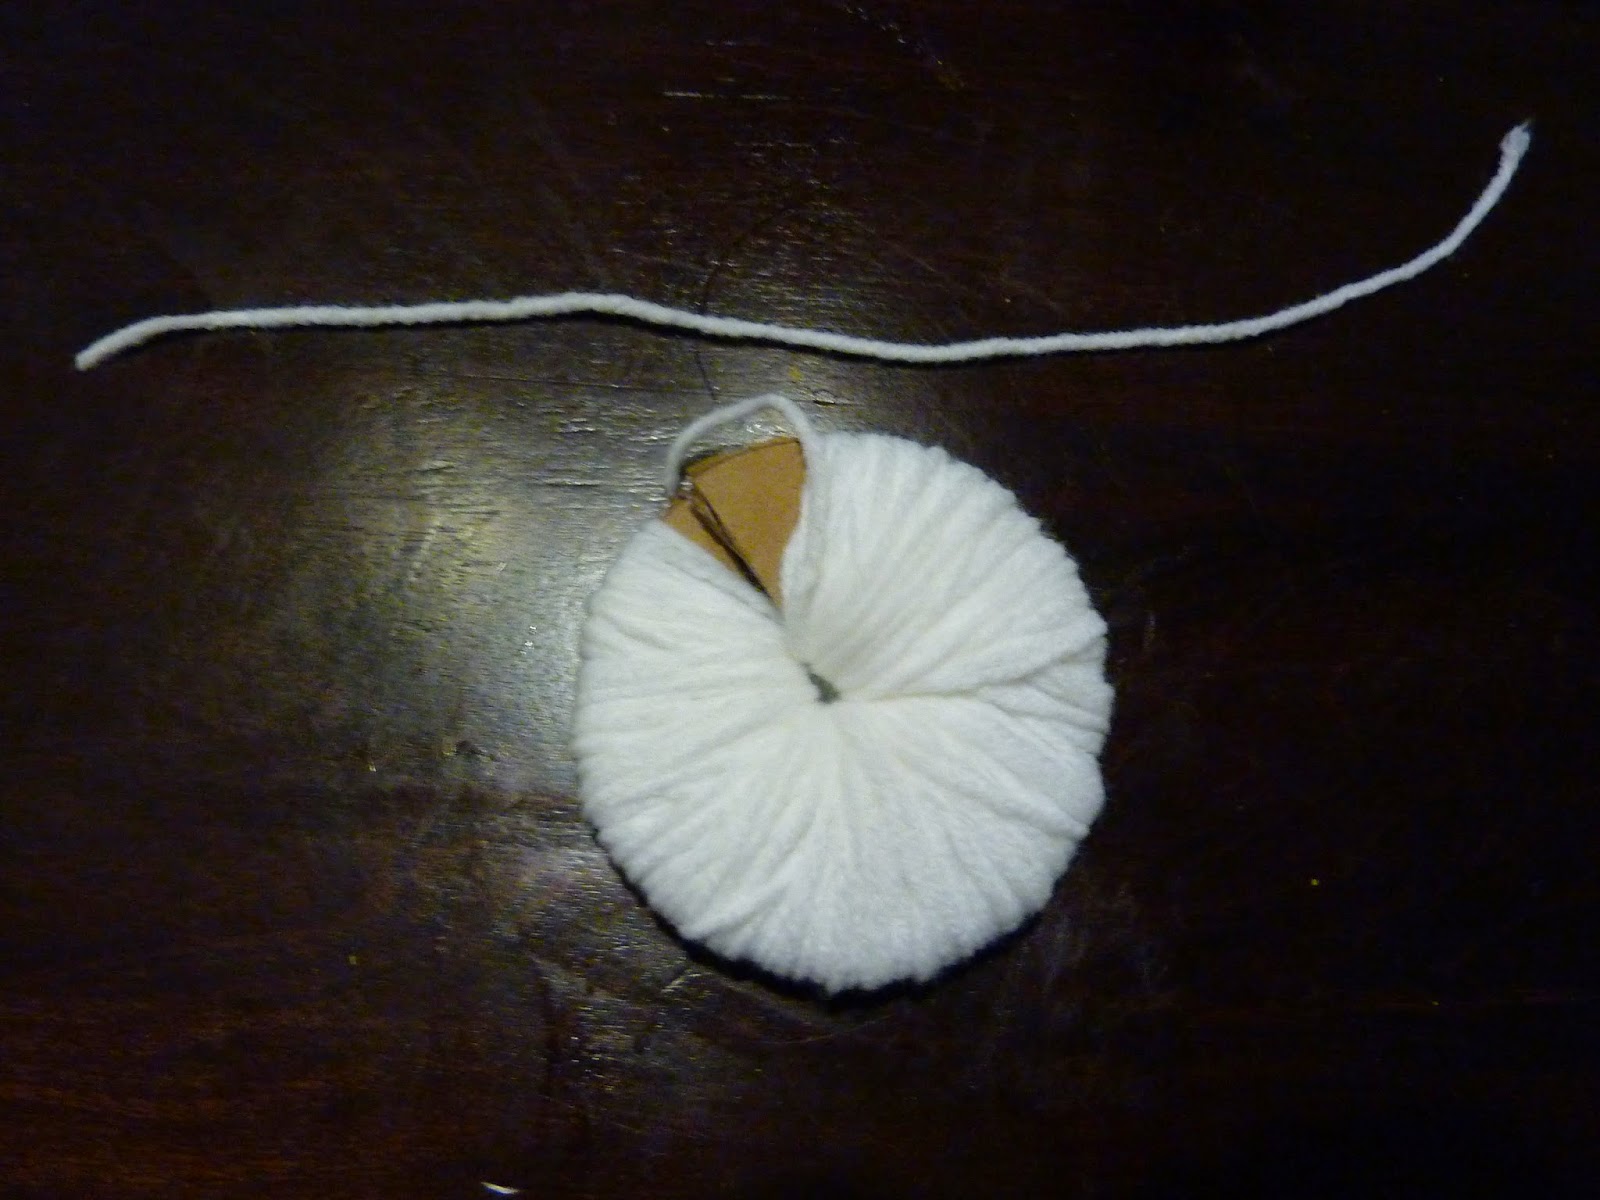
First I cut two circles out of a box. Cut a circle out of the center and cut a straight line from the outside to the inside of the circle. Templates done. Maybe just a little cheaper then buying a tool from Micheals?! lol! But to each their own ;)
Then you just start wrapping the yarn around the template - I found the snowballs looked a lot better when I did the yarn really tight - made them fuller, but it is up to you ;)
Keep going until your template is as full as you like (again the more yarn, the tighter you go - the fluffier your snowball)
Now you find the opening you had originally made and stick your scissors in between the two templates.... and cut! Go slowly otherwise it can get hard to hold the yarn together - you do not want it to all fall out just yet ;)
Cut another strip of yarn and wedge it in between the templates. Tie a knot and remove the cardboard! Simple! The more you do the faster you will get and you will be surprised at how many snowballs you will have! I know you can get a giant roll of yarn from walmart for $9, or you can also find yarn at the dollar tree!
The kids had SO much fun with the snowballs - and they really loved that Queen Elsa played with them! She was wonderful!
Do you Want to build a snowman? I love these kits and we used them in the kids goody bags! They were a hit with so many of the kids! The bags were bought at the dollar tree and the tags I made myself! I found a cute image on Google and used Microsoft Word to size and print them! I printed them on cardstock and then cut them to fit the baggies! I think you can also find cute cardboard tops on etsy but I tend to just make it all myself ;)
Inside I put large and small marshmallows, pretzels, jelly beans, chocolate chips and lolly pop sticks to hold it all together!
I did the same thing for these Olaf treats! "My name is Olaf and I like warm hugs" <3 Who doesn't love this snowman!!? The goodies were just a bunch of bulk candies sorted into baggies!
Came together nicely right?! So simple, such a hit!
Then of course the kids needed something to put the goodies inside of! For the boys we went with these blue bags (dollar store) and printed out an image of olaf onto cardstock. I made him the size of the 8 1/2x11 paper - so I used the extra along the bottom to create a snowy base, and then I used a hole punch to make the falling snow! The name tags were made out of left over craft foam
that I had laying around the house!
The girls bags we went with a different idea ;) We actually made these little bags... we did try to buy little bags, but didn't have any luck finding what we were looking for :( So these took longer then we had planned, but they came together so nicely!
Another simple but effective detail was my water bottles! I found an image of a melted olaf and used that to create these cut water bottle labels! Cut them out and taped them over the original labels!
These photo stands were also a huge hit! I took the project boards you can buy at Micheals and created these characters for the kids! I did this with the Monster High party as well but I used foam core.... the project board held up better - but I found it to be a little short. In the end the kids had a fantastic time pretending to be Elsa,
Anna,
and OLAF!!! I even made a foam nose that the kids could put on!
What is a snowman without his carrot nose?
AND THE CAKE!
I am SO PROUD of this cake! He was huge - the size of my fridge! He fed around 80 people plus he had a head made of Rice Krispies! And the ice around the bottom? Those I made with melted Jolly ranchers! The kids really got a kick out of the ice, everyone wanted some!
Here is a picture of the birthday girl and her cake - just to give you an idea of the size of the cake!
These are the special cookies that I made up for the party! I wish I had made the olaf cookies on vanilla cookies so that his arms had shown up better, but other then that I love them :)
Best frozen party ever! The birthday girls were both so happy with the party we put together! And the other kids were in love with Elsa and all of the games and goodies we had! The party was a great success! Now how do I top this next year?!


.jpg)


.jpg)


.jpg)
.jpg)
.jpg)
.jpg)
.jpg)
.jpg)
.jpg)
.jpg)
.jpg)
.jpg)
_0001.jpg)
.jpg)
.jpg)

.jpg)

